
Biofertilizers (natural fertilizers) are made from beneficial microorganisms that are good for growing crops and strengthening soils. Like traditional millets used for thousands of years to support families in India, Biofertilizers have long been the tool of organic farmers to improve the soil's fertility and reduce the use of chemicals.
Biofertilizers provide beneficial microbes that enhance nutrient availability, improve root development, and increase overall plant health, making biofertilizers a very effective alternative to chemical fertilizers. Biofertilizers can offer essential support regardless of the type of crop being grown, whether it be vegetables, grains, or fruits—by fixing nitrogen, solubilizing phosphorus, and aiding in the natural processes of growth.
Biofertilizers can easily be made at home using natural ingredients such as cow dung, jaggery, and a variety of microbial cultures. If you learn how to prepare biofertilizer correctly, you will be able to create a highly nutritious solution that will help your crops grow and keep your soil healthy and productive.
From solid microbial blends to liquid biofertilizer formulations, all provide specific advantages to your fields that will yield healthier soil, better crop yield and create an environmentally sustainable farming system. By applying the biofertilizers that you produce, your crops will receive everything they need to thrive and your land will be transformed into a vibrant, organic, and living ecosystem.
Understanding Biofertilizers: What They Are and Why They Matter
Biofertilizers are natural, microbe-rich formulations that enrich the soil with beneficial bacteria and fungi. These living organisms improve nutrient availability, boost soil health, and help plants grow more naturally—just like wholesome traditional foods nourish the human body. They are gentle on plants, easy to apply, and perfect for farmers who want sustainable, chemical-free cultivation. Whether you use solid blends or liquid biofertilizer, each application helps the soil become more fertile and alive over time.
What Is a Biofertilizer?
Biofertilizers are a form of organic fertilizer that consist of beneficial soil bacteria, such as Rhizobium, Azotobacter, Azospirillum and Phosphate Solubilizing Bacteria (PSB), which improve nutrient availability and promote plant growth through direct interaction with the soil and plant roots.
Highlights
- The origin of biofertilizer is natural & it is based on micro-organisms
- Biofertilizers are composed of living organisms vs. chemicals used in conventional agriculture that enhance plant health naturally.
- Biofertilizers help to make nitrogen, phosphorus and other micronutrients more available to the plants.
- There is no negative impact on the soil, water or environment, therefore biofertilizers can be used for organic farming.
Biofertilizer is just one type of Organic Fertilizer and is considered to be a sustainable way to supply nutrients to a plant because it provides support at the root level.

Why Biofertilizers Are Essential for Sustainable Farming
Modern Sustainable Agriculture is greatly aided by use of bio-fertilizers. These products allow farmers to move away from chemical fertilizers, restore soil fertility, and promote Ecological Balance.
Bio-fertilizers will provide an opportunity for farmers who want to use natural methods to improve Soil Health and Produce Quality to develop a Long-Term, Cost-Effective Solution to their farming needs.
Bio-Fertilizers Provide Farmers With:
- Reduced Dependence on Chemicals – Farmers can reduce their use of synthetic fertilizers while maintaining productivity.
- Soil Restoration – Microorganisms found in Bio-Fertilizers create and maintain Organic Matter in the soil which leads to Long-Term Soil Health.
- Strengthened Immune Systems of Plants – Plants that receive treatment with bio-fertilizers will have stronger immune systems and increased resistance against plant diseases.
How Biofertilizers Support Natural Plant Growth
Biofertilizers assist in plant growth through the development of a symbiotic relationship between microorganisms and plant roots. By increasing the availability of nutrients and stimulating root growth, biofertilizers will produce stronger, healthier plants.
Biofertilizers' Primary Functions
1.Stimulates Root Growth
Microorganisms encourage roots to grow deeper, allowing for greater absorption of water and nutrients.
2.Convert Atmospheric Nitrogen to Plant Usable Form
Nitrogen-fixing microorganisms will convert nitrogen in the atmosphere to a form that plants can use.
3.Unlock Phosphorus Surplus
Phosphate-solubilizing microorganisms are capable of unlocking the phosphorus locked in the soil.
4.Improve Soil Aeration and Water Retention
By providing improved soil aeration and water retention, biofertilizers will improve soil characteristics.
The Science Behind Biofertilizers: How Do They Work?
Biofertilizers are the products of living microorganisms that add value to soil health and plant growth. Their action is based on adding beneficial microorganisms (bacteria and fungi) to the soil to create greater access to nutrients for the growing plants. Biofertilizers provide a means of developing plants through the activation of natural biological processes, rather than relying on chemical means to stimulate growth. As farmers learn to create and apply biofertilizers, they will be able to greatly increase soil health while decreasing their reliance on agricultural products and promoting the sustainable production of food. Additionally, whether in the form of a dry mixed product or as a liquid biofertilizer, biofertilizers maintain soil life and productivity over successive seasons.
Nitrogen Fixation and Microbial Activity
The microbial population that fixes nitrogen is a critical component of several types of biofertilizers. By collecting the atmospheric nitrogen gas, these microbes make it available for absorption by plants in their usable form.
How They Support Plant Growth
- The ability of the nitrogen fixing bacteria to convert atmospheric nitrogen to nutrients that are available to plants means that the farmer uses fewer chemical fertilizers.
- Nitrogen-fixing bacteria increase the capacity of the crop's roots, provide the crop with greater vigor and greater health due to an abundance of nitrogen.
- Due to their ability to fix nitrogen, they contribute to permanent soil fertility as a result of the increase in microbial activity.
Why They Work
As long as a farmer properly treats a biofertilizer at the time of application and then subsequently applies it correctly to the crop through fertigation, using properly treated biofertilizers provides a means of sustainable crop nutrition.
Phosphate Solubilization and Soil Enrichment
By releasing the phosphorus that is locked in soil, PSB can also increase the availability of phosphorus to crops. The natural form of phosphorus in soils is not readily available to plants; therefore, being able to organically release phosphorus from soils allows for the continual and sustainable supply of phosphorus to crops.
Cut down on Chemical Fertilizers!!
One of the key inputs for successful crop production is phosphorus. The importance of using Phosphate Solubilizing Bacteria (PSB) to increase phosphorus availability will have a significant impact on the way we grow our crops and will provide for more efficient use of phosphorus.
Creates
- More has less reliance on Chemical Phosphate Fertilizers
- Increased savings on Fertilizer
- Less Toxicity to the Soil
SOIL STRUCTURE & MICROBIOLOGICAL ACTIVITY ARE IMPROVED.
Increase Overall Nutrient Uptake and Plant Health.
Why This Is Important
Knowing how to prepare Biofertilizers using PSB cultures gives the farmer a method to Naturalize and Enhance Soils so that they are Fertile over time without Chemical Buildup.
Plant Growth Promotion Mechanisms
Besides supplying essential nutrients, microbes that promote plant growth (PGPM) provide many other opportunities for crops to grow and thrive. Specifically, PGPM helps develop a more robust root system, increases the amount of nutrients plants can absorb, and protects the plant from various forms of disease.
Promoting Crop Growth
1. By producing natural plant hormones, including cytokinins and auxins, which stimulate the growth of roots by elongation and branching.
2. By improving the plant's ability to utilise nitrogen, phosphorus and potassium by utilizing them much more effectively.
3. By allowing for increased tolerance of drought and stress by developing a deeper-rooted system; therefore, plants are better able to tolerate these adverse conditions.
The Role of Liquid Biofertilizers
Liquid biofertilizers allow a quicker reach to the roots of the plants by using PGPM. Liquid biofertilizers can help to cover a larger area of soil and reduce competition between microbes. Liquid biofertilizers also provide greater chances for more rapid crop growth, particularly with fruits, vegetables and nursery plants.

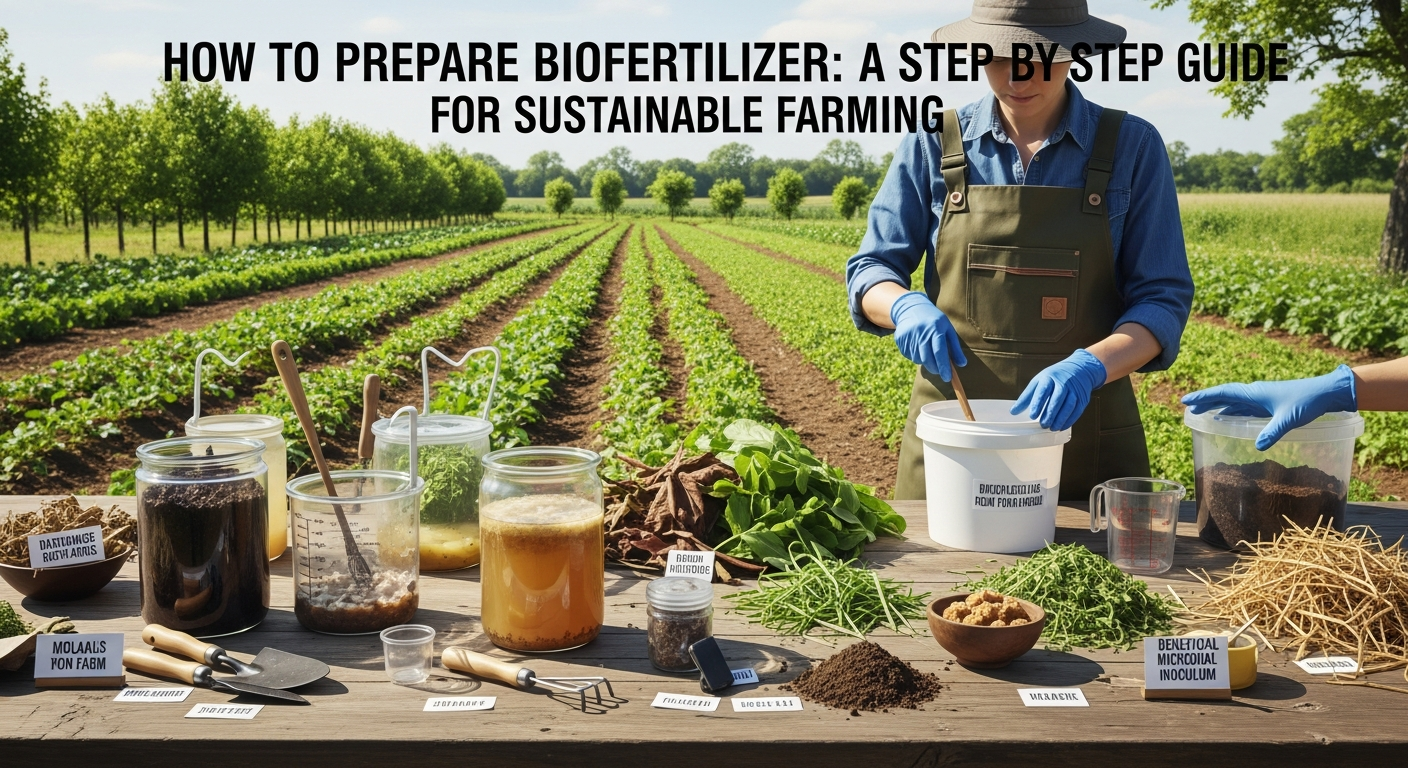
Essential Ingredients and Materials Needed to Prepare Biofertilizer at Home
Biofertilizer is a result of naturally sourced components that will help support the development of beneficial microorganisms and their ability to provide plant nutrients. Once you learn how to develop bio-fertilizers through the correct use of bacteria, carrier media, and equipment, making top-quality organic fertilizers can easily be accomplished at home. Each component of the Biofertilizer serves a particular function (just as the nutrients in a plant's diet do) and when combined together create a potent biological product that enriches the soil and improves the crops' nutritional quality and growth potential. When creating dry or liquid bio-fertilizers, if you use the strongest, freshest and cleanest quality of ingredients, you will achieve maximum microbial activity with the highest yield from your bio-fertilizer.
Microbial Cultures Needed for Biofertilizer
The active ingredients of a BIOFERTILIZER are the living organisms (active workers) that work together to attach nutrients to the soil, improve the soil's life, and enhance the growth of plants.
1. Nitrogen Fixing Bacteria:
Rhizobium, Azotobacter, Azospirillum). The nitrogen-fixing bacteria convert the nitrogen from the atmosphere into a form that is usable by the plant. It is essential for cereals, legumes, vegetables, and fruits. The nitrogen-fixing bacteria stimulate root growth and increase the amount of chlorophyll produced.
2. Phosphate Solubilizing Bacteria:
(PSB) - The phosphate solubilizing bacteria take phosphorus from the soil and free it so the plant can use it. PSB is ideal for soils that are low in phosphorus. It promotes root development.
3. Potassium Mobilizing Bacteria:
(KMB) - The KMB bacteria release potassium from minerals in the soil. KMB improves the quality, size, and quantity of fruit produced and increases the drought resistance of plants.
4. Mycorrhizal Fungi:
Mycorrhizal fungi form a beneficial relationship with plant roots. They help the plant absorb more water and nutrients from the soil and improve the plant's ability to survive stress.
Carrier Materials and Organic Inputs
The carrier materials provide a “home” for the microbes to provide them with a stable base in which to grow and reproduce.
The organic inputs used in fermentation act as nourishment for the microbes.
1. Cow Dung Slurry
- Contains both enzymes and naturally occurring microbes.
- Facilitates the fermentation process.
Used as an ingredient in both solid and liquid formulations of biofertilizer.
2. Jaggrey Solution
- A naturally formed energy source for beneficial microorganisms.
- Increases the rate of fermentation.
Provides maximum reproduction of beneficial microorganisms.
3. Sterile Soil or Peat Powder
- Primarily used in solid formulations of biofertilizers.
- Provides a suitable texture and good moisture conservation properties for the stored microorganisms.
Preserves the microbial culture during storage.
4. Compost or Farmyard Manure (FYM)
- Provides an organic base through which the microorganisms can reproduce.
- Provides long-term soil fertility.
Improves soil structure when applied.

Tools and Containers Required
To ensure that your bio-fertiliser products remain free from contamination and therefore remain efficacious, it is necessary to utilise the right *clean* and *appropriate* tools
1) Fermentation Containers (Drums, Buckets and Earthen Pots)
- All fermentation containers must be clean, non-metallic and ideally have a lid
- Fermentation containers provide an environment that is conducive to optimal fermentation temperatures
- Fermentation containers also prevent any insects or other contaminants from entering
2) Mixing Stick/Paddle
- Mixing sticks/paddles made using wood or plastic are preferred
- Mixing sticks/paddles are used to mix the fertiliser daily to allow for the introduction of oxygen
- Mixing sticks/paddles also prevent any build-up of sediment
3) Muslin Cloth/Fine Filter Mesh
- Muslin cloth or fine filter mesh are required to filter out the liquid bio-fertiliser
- They allow the separation of the microbial solution and solid material
- Muslin cloth allows for more efficient application using sprayers
4) Measuring Jugs & Gloves
- Measuring jugs are essential for the accurate mixing of components
- Gloves provide for safety while handling
- Gloves will also prevent exposure to microbes while mixing
5) Airtight Storage Bottles/Bags
- Airtight storage bottles are used to store final products
- The use of airtight storage bottles will extend the viability of microbes since air will not be present in the storage container
- Airtight storage bottles provide protection from light, heat and moisture
A Step-by-Step Process: How to Prepare Biofertilizer Efficiently
Making your own biofertilizer is easy, inexpensive, and very good for your soil! For each of the preparation processes, an important part of it will be to encourage beneficial microorganisms to grow, helping to make your crops healthier, stronger, and with more nutrients. Similar to how preparing food creates a stronger body through a proper diet, creating a biofertilizer supports the soil internally in much the same way.
Preparing the Base Slurry
The base slurry is the source of nourishment for microbes and helps them establish themselves within the base. This is the basis upon which the bio-fertilizer is built and therefore provides assistance to all of the microbes present within the slurry to grow and thrive.
What You Will Need:
- Fresh Cow Manure
- Crushed Jaggery (Microbial Booster)
- Fresh Clean Water
- Mixing Bucket
How You Make the Base Slurry:
- Mix the Cow Manure with the Water to form a paste without lumps (i.e. a smooth paste).
- Once the Cow Manure has been mixed into a paste without any lumps, you can add the Crushed Jaggery (Sugar) to your base slurry, which provides the energy required for the microbes to increase in number.
- Stir the mixture very well for about 3 to 5 minutes until you see a well-mixed slurry.
Significance of the Above Steps:
The base slurry will create the proper conditions needed by the microbes to flourish.
This mixture will provide the necessary nutrients and energy for a very effective bio-fertiliser.
Adding Microbial Cultures and Mixing
Live beneficial microbes are essential for creating successful biofertilizers because they provide three main benefits: nitrogen fixation, phosphorus solubilization, and enhanced plant growth.
Some of the most common types of microbial cultures used in biofertilizer preparation include:
1. Rhizobium for nitrogen fixation
2. Azospirillum to promote root growth
3. PSB (Phosphate Solubilizing Bacteria)
4. Mycorrhizal fungi to increase nutrient absorption by plants
To mix the microbial cultures into the slurry, you should measure out the appropriate quantity of each culture and then add them directly into the slurry mixture. It is important to stir the slurry both clockwise and counterclockwise to ensure that there is sufficient oxygen in the mixture. Additionally, it is important to keep the microbial cultures dispersed throughout the slurry, which can be done by making sure there are no lumps in the slurry.
The addition of the correct mixture of microbial cultures will convert the slurry from a simple mixture to an active living biofertilizer that is filled with beneficial microbes that will assist crops in growing.

Fermentation Process for Biofertilizers
This is a fermentation process which is used to convert the organic matter into biofertilizer and improve soil fertility by increasing microbial activity, which, in turn, releases nutrients for plants. Therefore, fermentation is considered one of the most important steps in creating liquid biofertilizer.
Process of Fermentation
- Place the mixture in a hermetically sealed container (plastic barrel or bucket).
- Cover with breathable cloth (do not completely seal the container).
- Store the container in a hot area (temperature must be maintained at 25-35 °C).
Mix the contents of the container daily to ensure that there is enough oxygen to allow the fermentation to continue.
Quality Control and Storage Tips for Homemade Biofertilizers
Making your own biofertilizer is a great way to support sustainable agriculture as well as preserve the quality of your biofertilizer after you have made it. It is also very important to have proper storage methods for biofertilizers because they contain live microorganisms that need to be cared for properly in order to stay active. When creating a biofertilizer mix (solid or liquid), by using good quality control practices (sanitizing containers, preventing contamination, storing at the correct temperature, sealing containers), you ensure that you create a biofertilizer that will perform well in the field and provide the best benefit to your plants and soil.
How to Ensure Your Biofertilizer is Contamination-Free
To maintain healthy and active microbes in your biofertilizer, it is important to keep your product free from any contaminants. Contamination reduces the potency of the product and can add harmful pathogens to your soil.
Avoiding Contamination:
1.Only Use Clean Containers
To remove all unwanted bacterial or fungal spores, wash containers (buckets, drums, jars) prior to preparation, and place them in direct sunlight.
2.Maintain Fermentation Temperature (25 – 35°C)
If the temperature is too high, the microbes will die; if it is too low, the fermentation process will slow.
3.Cover Fermentation Containers
You should cover the fermentation containers with breathable material (muslin cloth or other breathable lids) to prevent any dust, flies, or other particles from entering your mixture.
4.Do Not Use Expired Microbial Cultures
Prior to using these cultures, make sure to check and confirm whether they are viable.
Signs Your Biofertilizer is Contaminated
The biofertilizer may be contaminated if it smells bad or rotten, if there are patches of surface mold, if there are odd colored spots or patches. If any of these conditions exist, discard and re-ferment another batch.
How to Store Solid and Liquid Biofertilizers
To maintain the viability and safety of biofertilizers, they must be stored correctly. Solid and liquid biofertilizers require different storage conditions.
- In order to properly store solid biofertilizers, they should be kept in a cool and dry place, out of direct sunlight and away from heat sources.
- It is also recommended to store them in breathable bags, such as paper or jute, when possible,
- this helps to keep them from clumping together due to moisture and helps reduce fungal growth.
Liquid biofertilizers should be stored in an opaque, airtight container (e.g. a bottle) so that they do not get exposed to light. They should be kept in a cool location, but do not have to be refrigerated. Prior to use, the product should be shaken gently to help activate the microbes that may have settled on the bottom of the container.

Maintaining Microbial Viability Over Time
For your DIY Biofertilizer to be usable, and effective, the Micro-organisms (Microbes) need to be alive, and well-active. Microbial viability will enhance the nutrient fixation properties of the Biofertilizer and provide greater soil health.
How To Keep Your Good Microbes Healthy And Alive
Keep Away From Heat
The heat will kill beneficial microorganisms within the bio-fertilizer.
No Mixes With Chemicals
Pesticides and chemical fertilisers kill the majority of the beneficial microorganisms.
Moisture Levels Must Be Correct
If the mixture is too dry, the microorganisms will die; if it is too wet, it will be contaminated.
Use Only Fresh Ingredients
Using fresh Jaggery, Cow Dung, and Culture provide the best fermentation for the Microorganisms.
The Signs of Healthy And Active Microbes are:
- Mildly fermented smells
- Light bubbling when shaken (for the liquids)
- No visible molds
Application Techniques: Using Your Prepared Biofertilizer in the Field or Garden
The next step after you know how to create biofertilizer is to apply it correctly on your soil and plants. Biofertilizers contain live organisms that increase the fertility or nutrient content of the soil and enhance plant ability to absorb and assimilate nutrients. Using the correct way to apply a biofertilizer is very important in order for the beneficial microorganisms in a biofertilizer to establish themselves in the root zone of the plants being grown. Each method of applying biofertilizer—soil mixing or foliar spraying or other ways—offers certain advantages that help promote healthy, robust growth of all plants (vegetables, fruits, grains, etc.). When used properly, biofertilizers promote soil health, natural nutrient cycling and sustainable agricultural practices without using potentially dangerous chemical inputs.
How to Apply Biofertilizer in Soil
The standard method for applying Biofertilizers is through a Soil Application, where Microorganisms from the Biofertilizer come in direct contact with Root Structures on Growing Plants.
1.Basal Application – Soil Mixing:
Prior to sowing your crops, mix approximately 1-2 Kg of Solid Biofertilizers into the upper layer of Soil at an Acreage Rate; this will ensure that the Microorganisms are settled into the Root Zone before the roots of your crops have started growing and developing.
• The Basal Application is most commonly used for Vegetables, Pulses and Cereal Crops.
2.Root Dipping Method – For Seedlings:
Make a Slurry of Solid Biofertilizers mixed with Water and a Small Amount of Jaggery, so that it will stick to the roots after they have been submerged in the mixture for approximately 20–30 minutes prior to transplanting.
• Best used for Tomatoes, Chilies and Saplings of Fruit trees.
3.Soil Drench Method:
Dilute 1 Liter of Liquid Biofertilizer in 200 Liters of Irrigation Water and Drench the Soil surrounding the Plants with it
• This method will provide the Plants with increased Nutrient Availability and will also improve the Microorganisms present within the Soil.

Using Liquid Biofertilizer for Foliar and Root Application
Liquid biofertilizers are easy to use, and act right away. They are quickly absorbed by leaves and roots.
1) Foliar Spray:
Combine 500 milliliters of liquid biofertilizer with 15 - 20 liters of water, and spray directly onto the leaves. Do this in the early morning or at twilight. The liquid will help the plant absorb nitrogen and micronutrients very quickly.
2) Benefits:
- Corrects nutrient deficiencies very quickly
- Increases the plant's immune system
- Increases the plant's flowering & fruiting ability
4) Root Zone Drip Application:
Add liquid biofertilizer directly into the tanks on drip irrigation systems. This method ensures that you have a uniform application of liquid biofertilizer throughout the deep root zones of the plants. This method works very well on orchards, vineyards, and in greenhouses.
5) Seed Germination Boost Spray:
Spray a diluted solution of biofertilizer on the nursery beds and/or trays. The use of liquid biofertilizer will promote a stronger early growth pattern, resulting in higher germination rates.
Dosage Recommendations for Crops and Vegetables
To sustain plant growth and the longevity of microbial life throughout the growing season, the proper concentration of biofertilizer should be used.
Biofertilizer (general crop):
- Solid: 1–2 kg (2–4 lbs) per acre
- Liquid: 500 ml (0.5 l)–1 liter (1 qt) per acre.
Vegetable crops (e.g., Tomatoes, Eggplants, Peppers) should be treated as follows:
- Root dipping and soil drenching every 20 to 25 days (equal amounts).
- Foliar spray (using a.5% solution) when in flower.
Fruit crops (e.g., Mangos, Bananas, Citrus) should be treated as follows:
- 2 to 3 liters (0.53 to 0.79 gallons) of liquid biofertilizer per acre via drip irrigation (to be applied when the new leaves sprout and shortly before fruiting).
Grain crops (e.g., Wheat, Rice, Corn) should be treated as follows:
- Seed Treatment and soil mixing at planting time.
- A Soil Drench 30 days after planting.

Troubleshooting Common Issues When Making Biofertilizers at Home
You must prepare and store bio-fertilizers correctly, as these products are based on microorganisms and can easily lose their potency in adverse conditions. Most importantly, identifying the signs of failed fermentation, common mistakes made during the fermentation process, and methods to improve the performance of poor-quality fermented products will help keep the bio-fertilizer you create at home active, full of nutrients, and useful for your plants.
Just like cooking requires the right amount of ingredients, the right amount of heat, and the proper cleanliness, creating a quality bio-fertilizer also requires knowledge of what is required for success and how to do so consistently. The troubleshooting sections below describe some of the specific problems you may encounter when dealing with bio-fertilizers and offer solutions to each
Signs Your Biofertilizer Batch Went Wrong
Because of the simple errors new users tend towards, the quality of the end product may be affected by improper handling, sanitation, and mixing ratios. Avoiding these errors will create a successful and effective microbial product.
A. Using Dirty Tools/Fermentation Containers
The presence of 'bad bacteria' in contaminated containers will allow for their proliferation. It is essential to thoroughly clean all tools prior to their use to eliminate the risk of contamination, which may otherwise result in the destruction of the entire batch!
B. Improper Mixing Ratios – Using Too Much or Too Little
Inappropriate amounts of ingredients can greatly affect the potency of the biofertilizer. Too much jaggery could result in excessive fermentation; too little culture will weaken the biofertilizer. The correct ratio that should be followed is:
1 part culture, 10 parts slurry, and 20 parts water
C. Fermentation at Improper Temperatures
Optimal temperatures for fermentation are between 25 and 35 degrees Celsius; anything colder will slow down microbial activity and too warm will kill beneficial microbes. Place your containers in areas that are warm (not in direct sunlight); shaded areas are best!
Common Preparation Mistakes to Avoid
To ensure you apply a healthy, productive batch of your biofertilizer, you should establish early warning signs of a weak or harmful batch of your product.
a. Foul Smell In Place of Fermentation Scent
An effective biofertilizer has a mild sweet/sour/earthy scent; therefore, if the biofertiliser has a rotten/pungent smell, you may have a contaminated batch due to harmful microbes.
b. Mold/Fungal Growth Present on Top of Product
If you see green/white/black patches of mold on top of your biofertilizer, this indicates that the beneficial microbes have died.
c. Lack of Gas & Foam Bubbles Created During Fermentation
Healthy liquid biofertilizers typically produce gas and foam bubbles during the fermentation process. If you do not observe bubbles, it indicates that the microbes are no longer alive or were inactive; typically, this takes place due to the presence of low ambient temperatures or because the culture has expired.
How to Fix Ineffective Biofertilizer
If you suspect that your biofertilizer is not working it is very unlikely that you will have to throw it away. Most batches can be corrected by making a few simple adjustments.
a. Re-Inoculate with Fresh Microbial Culture
Add to your biofertilizer new cultures of nitrogen-fixing or phosphate-solubilizing microorganisms. Mixing in the new culture and allowing them to ferment for an additional 24-48 hours helps to promote higher concentrations of microbes.
b. Refresh Fermentation with Fresh Jaggery and Cow Dung Slurry
Mix in an equal volume of freshly made cow dung slurry and jaggery. Using jaggery provides a readily available food source to microbe to support rapid reproduction and growth. This process is excellent for batches of biofertilizer that are weak, slow fermenting or poorly produced.
c. Use Weak Biofertilizer as a Soil Conditioning Agent
If the microbes cannot be revived, then the biofertilizer has no further use, and should not be discarded. Instead, the biofertilizer can be applied to the soil at a rate that will improve the structure and organic matter in the soil. At the same time, this practice allows for a new and active biofertilizer to be produced.

FAQ:
Q1. How do I prepare biofertilizer at home?
Mix cow dung slurry, jaggery, and microbial culture, then ferment the mixture for 3–5 days in a clean container.
Q2. Can I make liquid biofertilizer easily?
Yes, just ferment the biofertilizer mixture in water, strain it, and use the liquid for spraying or soil application.
Q3. How long does homemade biofertilizer last?
When stored properly, liquid biofertilizer lasts 3–6 months, and solid biofertilizer can last up to 1 year.
Q4. Why is my homemade biofertilizer not working on crops?
It may be due to poor fermentation, expired microbial culture, contamination, or unsuitable soil conditions.
Q5. How much biofertilizer should I apply to crops?
Use about 500 ml liquid biofertilizer mixed in 15–20 liters of water, or 1–2 kg solid biofertilizer per acre.
Q6. Can I use biofertilizer along with chemical fertilizers?
Yes, but apply them at different times to prevent chemicals from killing beneficial microbes.
Q7. What temperature is ideal for fermentation?
A warm range of 25°C–35°C is best for active microbial growth and proper fermentation.
Conclusion: Embrace the Benefits—Start Preparing Your Own Biofertilizer Today!
The biofertilizers created by home planting are an inexpensive way to farm, as well as an important step toward healthier soil, more robust plants, and a sustainable future. By learning to make biofertilizers correctly, you will make a product that has beneficial microorganisms that enhance the nutrient uptake of the plant and increases plant growth in a natural way. A homemade biofertilizer will also improve your soil's fertility and re-establish the life in your fields, rather than relying heavily on chemical fertilizers, which will damage your soil over time.
The process of making a biofertilizer at home is straightforward, ecological, and requires only a few basic ingredients: cow dung, jaggery, and microbial cultures. You can prepare either a solid or a liquid mixture of your biofertilizers, and with each new batch you make, you create a productive tool for improving plant growth and health. These eco-friendly natural fertilizers will also enrich the soil, enhance microbial diversity, and promote long-term sustainability, enabling your crops to flourish without causing harm to the environment. The biofertilizers are easy to make and extremely affordable for farmers, gardeners, and anyone else who wishes to move toward environmentally sustainable farming practices.
The thing that makes biofertilizer so good is that when you prepare your biofertilizer at home, you can control what goes into your soil, so you can guarantee the quality and freshness of your products. With every batch you prepare, you're one step closer to being chemical-free, having healthier plants, and creating better soil structure. In the long run, you will have stronger plants with increased yields and more resilient crops, all due to the use of natural, sustainable sources of nutrition!
Take action right now. Start today by using biofertilizer and by experimenting with different types of cultures. Add this to your regular farming practices and you will support a healthier soil, stronger crops and a more environmentally-friendly tomorrow. Your land and your future crops will thank you!